Thursday, 20 September 2012

Look what happened when I turned my back …

Since the boy monster I made was looking a bit lonely, I made him a friend.

P1010666

You can tell it’s a girl from the bow in her hair!  She too has a rice bag inside to make her warm and snuggly.

P1010668

I introduced them and kept my fingers crossed that they’d like each other.

P1010667

Notice the twinkle in her eye?  I left them alone for a moment and then when I came back, what did I find nestling in their laps?

P1010669

Twins!!!!

These baby monsters are also filled with rice – just perfect for slipping into your gloves on a cold morning.

P1010671

Right I’m off to separate the parents before my house becomes overrun with tiny monsters!

Sally

xxx

Tuesday, 18 September 2012

A Monstrously Toasty Day

 Today I have been making a fleece monster!
P1010660
But this is no ordinary monster – turn him over:
P1010662
Open up the cleverly concealed velcro:
P1010663
and you find the nuts and bolts that make him work! 
P1010659
A rice bag, ready to remove, heat in the microwave and pop back inside the monster, making him lovely and toasty, just perfect for cuddling in bed, or on the sofa.  In face he actually does love the sofa, just look at where he ended up when my back was turned.
P1010661
I’m really rather pleased with how he turned out, and I’m sure he’s not going to be an ‘only-monster’ for very long – in fact I have a bit of pink fleece around here somewhere, I’m sure he’d like a girl monster to keep him company.  Watch this space!
Sally
xxx

Monday, 17 September 2012

A Cushion Frenzy

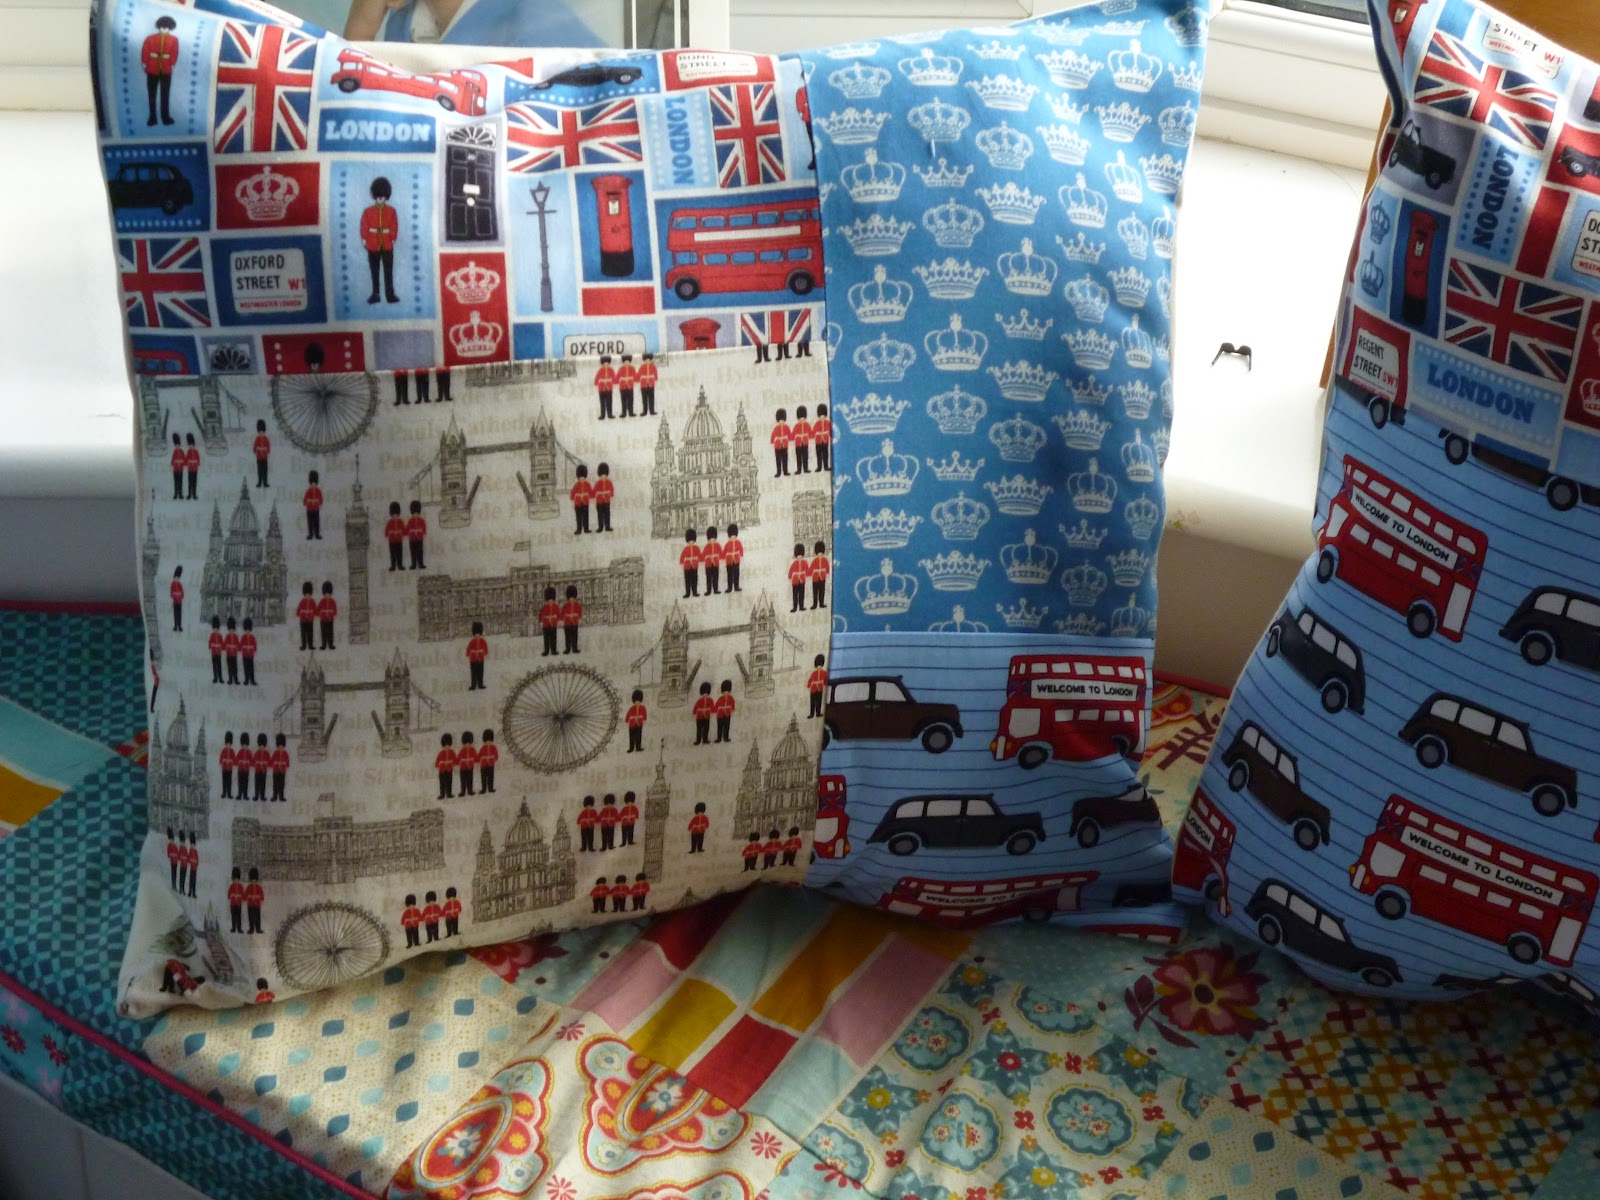
I've had this fabric for ages, just ready for this specific purpose, but as usual with me, I can only seem to get on with making things when the deadline is imminent. My Aunt and Uncle are visiting from Australia (they arrive on Friday) and I wanted them to have a light, easy to carry present to take home to remind them of their visit to England.


(Please ignore the clash with my window seat - obviously I would never put such diverse fabrics that close together to photograph!!)

Anyway I've made 4 patchwork cushion covers so they can fold them up and pop them in their case - no excess bagage charge and hopefully a happy Aunt and Uncle.

I bought 4 FQ's of fabric from Fabric Rehab and cut them into 4 differently sized rectangles, and patchworked them together.  The backs are plain calico, but I've used the leftover patterned fabric to edge one side of the envelope backs (sorry no photo).  All of the cushions are slightly different.


These are two of them, the others are very similar, just with the fabrics in a different order.

Fingers crossed they'll like them.

Sally
xxx

Sunday, 5 August 2012

Lunch bags for 2 special boys

Today I've been sewing frantically as my twin nephews are starting school in September and I have promised them a lunch bag and PE bag each.


A black lunch bag for twin 1

and a blue lunch bag for twin 2, can you guess what their favourite film is?!

And here are their PE bags:


Not a great photo of the PE bags, but I'm sure you get the idea.

Anyway just a short post today, I'm being distracted by the Olympic athletics on the TV - aren't Great Britain doing well!  Go Team GB!

Sally
xxx

Saturday, 21 July 2012

Scarf and has anyone got a home for these bunnies?

Two things to share with you today, bunnies who are looking for a new home,

P1010166

and a work in progress:

P1010164

First my scarf, it’s a knotted scarf made from some wool I had knocking about.  Yes, yes I know it’s the first sunny day we’ve had this year and I know that it’s July, but as I’ve already made & sent off my Christmas projects for Simply Homemade magazine, I’m convinced it’s much later in the year than it really is!  Anyway this scarf was inspired by a friendship bracelet in this month’s issue of Mollie Makes,

P1010165I made it one evening and when I showed my daughter the next morning, she asked why I was making a mini-scarf.  So I thought I’d upsize it just a bit, change the pattern around and voila, a scarf is born.

Right the bunnies – I was given these little bunnies,

P1010166but I really don’t have the space or the inclination to keep them, so I thought I’d ask out there in blogland if anyone would like them.  There are 6 of them in all, 2 of each colour, and the bunnies are covered in a sort of flock(?) type covering.  Sadly one of the blue bunnies has had a bit of a fight and the fabric torn away from his ear.    They have some sort of wire spike at the bottom.

P1010168

Ahhhh – look at that cute face, who could resist it!

If anyone would like them, just leave me a comment and at the end of next weekend I’ll see who wanted them and post them out to you.  If more than one person wants them then I’ll pick names from a hat.  I’m sorry I can only post them to the UK, (as I’m not quite sure how I’d declare them on the customs form).  If nobody wants them then boo hoo they’ll have to find a new home at the local charity shop.

Enjoy the rest of your weekend.

Sally

xxx

Sunday, 15 July 2012

Lined Coin Purse Tutorial


I saw my sister-in-law last week and she asked me how to make small zipped purses.  I know there are lots of other tutorials on this subject, but as it was a personal request I thought I’d write one -  so especially for Debs, here is a quick tutorial. 

Cut out 4 pieces of fabric, 2 for the outer and 2 for the lining.  These can be any size you like, but mine were about 5 inches by 4 inches.  Just make sure the zip you are going to use is wider than the fabric.

 pursetut1

Lay one piece of outer fabric (flowery one in my case) face up on the table and lay the zip along the top edge.  The zip’s teeth should be face down on top of the fabric.

pursetut2

Next step is to lay one of the lining pieces face down on top of the zip, again lining up the top edge of the zip with the top edge of the fabric.
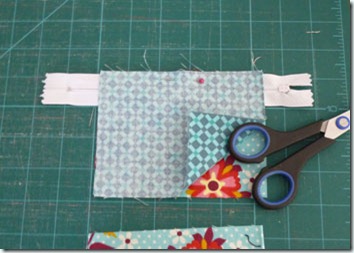
pursetut3

Pin the ‘zip sandwich’ together and then use a zip foot to sew all pieces together, along the top edge.  Pull the front and back pieces back away from the zip and position then wrong sides together.  You should be able to see the zip teeth now.  At this point it helps to press the fabric away from the zip.
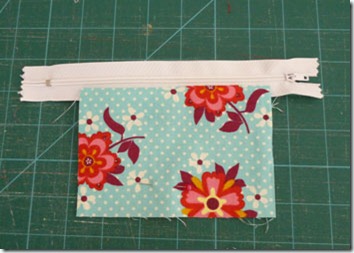
pursetut4

Still with the zip foot on the machine, topstitch along the edge of the fabric to hold the layers together, you can see what I mean in this photo.
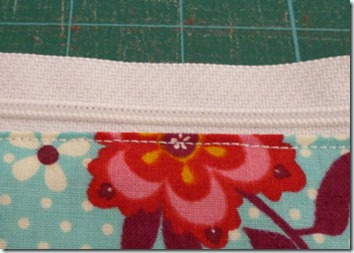
pursetut5

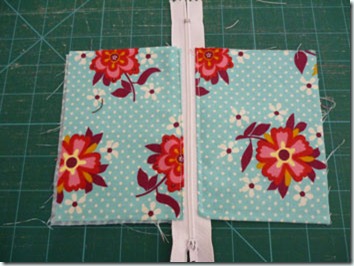
Lay the other piece of outer fabric face up on the table and place the zip (with the pieces attached) on top of the outer fabric.  Again the zip teeth should be facing downwards.  The outer fabrics should be placed with their right sides together.

pursetut6

Take the other lining piece and lay it face down on top of the zip, lining up the top of the fabric with the top of the zip. 

pursetut7Pin along the top and sew together.  Open out the purse like the photo below, and top stitch as before, along the edge you have just sewn.

Front:
pursetut8

Back:  (oops looks a bit wonky here – I blame the camera!)

pursetut9

IMPORTANT: Open the zip half way now – otherwise you’ll have problems when you try to turn the purse in the right way later & I’m not taking the blame for not pointing it out clearly!!!!!!

Take both pieces of outer fabric and place them so that their right sides are together and pin.  Take both lining pieces and pin them so that their right sides are together.  The zip will be in the centre.

pursetut10

Starting from the centre of the lining pieces, sew a rectangle around the outside of this large rectangle.  Be careful when sewing across the zip piece – you don’t want the metal zip ends to break your needle.  If you are likely to hit the metal pieces, just move the seam slightly further from the edge to avoid it.  Do not sew right up to where you started, leave a gap of about 2 inches, this will allow you to turn the purse in the right way.  Clip the corners and cut off the unused bits of the zip.

pursetut11

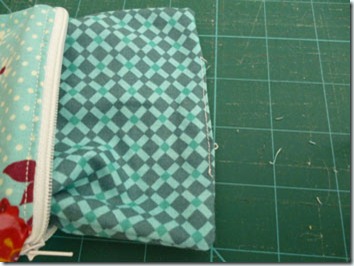
Turn the purse through the hole in the lining and push the purse into the correct shape.  Pull the lining out of the purse and topstitch the hole in the lining closed. 
pursetut12

Push the lining back in and you’ve now finished your purse.
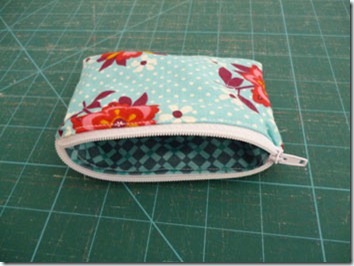
pursefinished

Right Debs, no more excuses, I expect to see lots of these little purses next time we come to visit!  For anybody else who’s actually made it to the end of my tutorial, I hope it’s been helpful.

Sally

xxx

Saturday, 7 April 2012

Giveaway Winners


A quick hello to all my new followers & thanks for all your comments.  It’s interesting to see how different everyone feels about travelling.  Personally I love travelling but I hate driving myself, I love to be able to look out of the window & just watch the scenery go by. 

If money was no object however, I’m sure I’d love to travel by private jet

private-jet

obviously going somewhere hot & sunny & obviously with my own chauffer to take me to the airport, and maybe a a helicopter transfer to my own desert island – oh well, a girl can dream.  But back to the important business of my giveaway:

Drum roll please ……  the winners of my doorstop giveaway are ………

Number 3 – Gill – Who liked the bus doorstop

Number 2 – Rebecca – who preferred the train

Number 10 – Shiraz – hope the scooter doorstop is ok for you.

I will email the lucky three winners now to get your postal address.

Sorry to those who didn’t win, but you can all go over to Emma’s blog It’s all about the fabric to find the tutorial to make your own doorstop.

Hope everyone has a lovely Easter weekend

Sally

xxx